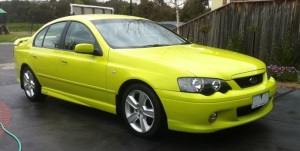
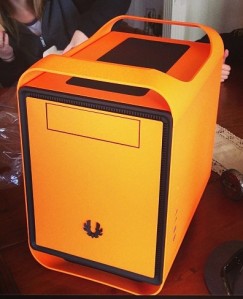
Wanting to do this without forking out a few hundred on a converter or adaptor specially made for the BA, I set out to find a way of doing it on the cheap.
Without all the info I found at fordmods and fordforums, I would never have figured this out, so my thanks go out to both sites.
First things first, was creating the cable to actually connect to the input connector on the BA ICC.
You can look at this document from fordmods (where I found the bulk of the info for this) to see how to do it. I’ll also explain it here.
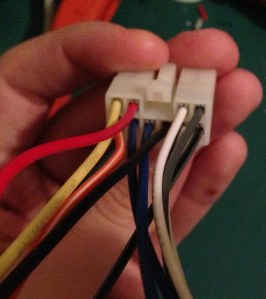
The connector itself you can get from the older E-Series falcons (EF and EL to be more specific). Their window demister and antenna height switch both use the same connector. Whilst this is really how the quintessential cheapskate would do it, I got lazy and ended up buying the AerPro harness that had the same connector. The one you’ll want is the Toyota/Diahatsu OEM Harness, Product code: 71-1761. You can get it online from here, otherwise you can get it from any auto shop and costs about $15-25.
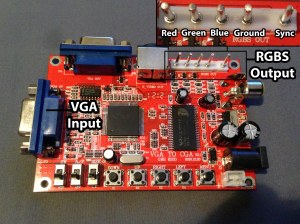
Now we have the 10 pin connector needed for the ICC, we also needed to make up a cable. Originally, I had it wired directly to VGA (As shown in the document), but after no luck trying to use PowerStrip to change the horizontal scan rate manually, and without wanting to fork out $100+ on a PCI-E graphics card that I couldn’t fit into a small case anyway, I ended up using a CGA to VGA adaptor.
These are traditionally used for connecting a computer up to an old arcade monitor, which also uses this annoying 15KHz horizontal rate. I bought mine from eBay, as I could not
find anywhere else to purchase one. It cost me $42 after postage. But it is needed to connect your computer up. And still going to be cheaper than buying a ready-made adaptor/converter.
You will also need a 5v supply to power this. You can do this however you want (even going from USB from the computer itself) but I ended up just using a DC-DC power converter, which I again bought from eBay. It only cost me $3, but you have to wait for postage from China.
Now, as for the cabling itself, I used a 6-core shielded/screened data cable from Jaycar Electronics (WB-1575), which was $1.65 per metre. You can also use the same stuff from Altronics (W 2710)
I should also warn you now that you’ll need the right tools and skills to solder the wiring together. I won’t explain how to solder as there’s an abundance of information on the net.
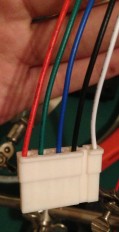
What you want to do is wire the ICC connector to the RGBS out of the VGA converter. So, get the RGBS cable that came with the converter, and chop it off at the end.
You will have to wire the RGBS connector to the shielded cable, and the ICC connector to the other end of shielded cable. This is so the cable is shielded from any interference from any other electrical equipment in the car.
Below I’ve drawn a wiring diagram to help. The ICC Connector is from the rear view, i.e. if you were looking at the connector from the rear side where the wires are coming out.
Once it’s all wired up, you can test it by making sure you have a 5v source (I chucked some spade terminals on my DC-DC converter and connected it to the cigarette lighter plug behind the tissue box) and powering the converter. Then plug a VGA cable from any computer into the input on the VGA converter, and plugging the RGBS to ICC cable in.
Everything should be plug and play, but if there is an issue, try changing the switches on the bottom left of the board. There’s is a lack of info on the VGA converter, but from what I’ve gathered, the switches will 1. Switch between PAL/NTSC, 2. Switch between CGA or S-Video output, 3. Swap output size/zoom.
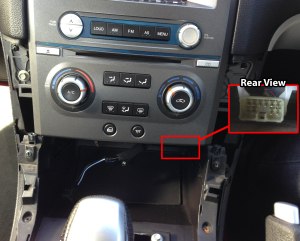 EDIT: I should note, where the ICC connector is for the video input. It is pictured to the right, and you have to plug it in towards the front. It makes sense if you feel for the plug as indicated. Read through the first few steps here to see how to get to the connector itself. You only need to read up to removing the tissue box holder.
And that’s it so far! This was more a proof that it could be done for me, making sure I could actually connect a computer up before I invest all the time/money into doing it. Next up I’ll install a touch screen overlay onto the ICC screen.
Here’s a video with a laptop running on mine (Note I was bad and didn’t use shielded cable. I will be once I install the computer)

